
I absolutely love magnets. If my friends are ever travelling that is the gift I request they bring me back as a souvenir. I wanted to make some super cute high vibes magnets for this article today to inspire you to make some too. These would make great gifts and are super easy to slip into an envelope or greeting card to brighten someone's day.

(Disclosure: This post probably contains affiliate links. See the disclosure policy for more information. You can find the disclosure policy here.)

High Vibes Magnets
For this magnet set you will need a Cricut cutting machine – or an alternative brand cutting machine. I absolutely love my Cricut Joy Xtra. I wouldn't be without it.

For this craft you will also need magnetic printable paper sheets and of course your trusty printer. If using an inket printer I would recommend this glossy paper right here (also see below)

The glossy finish is important for magnets. I think it looks a lot better than matte. I also add a clear laminate to the top of the magnetic sheet once they are printed. This just gives the magnet extra protection and it looks a little thicker and more sturdy.
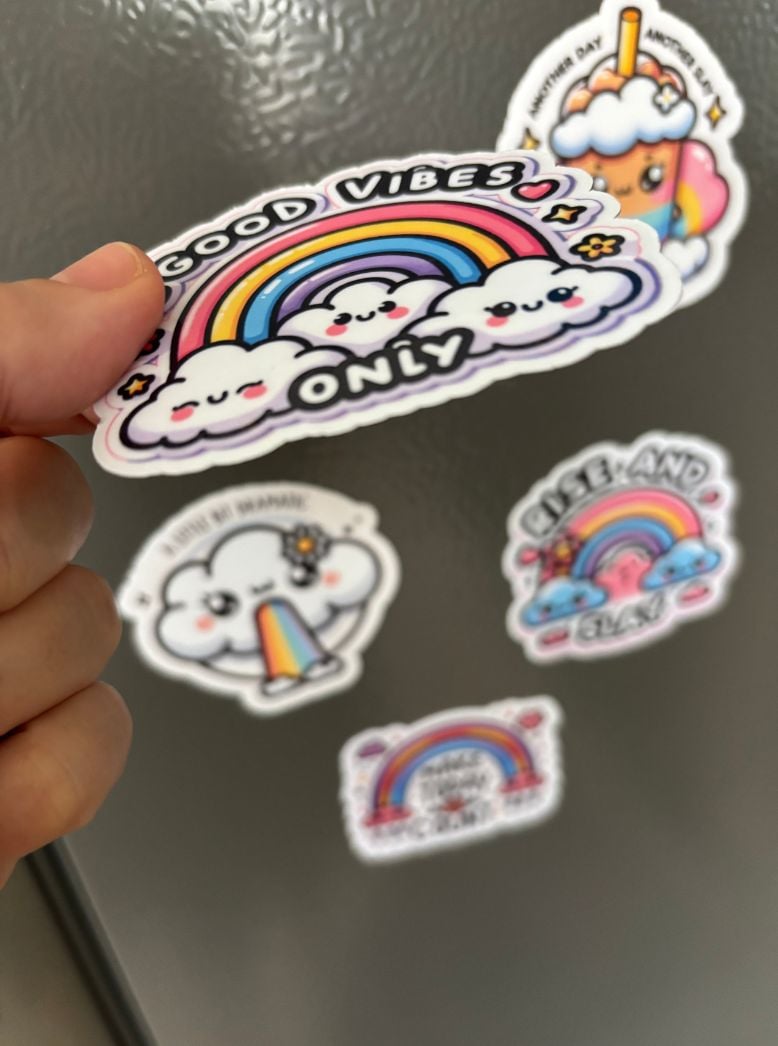
Now these magnets whilst being extra cute, are not amazingly functional. They are great to stick a bill or your child's latest painting to the fridge. However, the downside is that they won't hold more than 2 sheets. But the fun aesthetic is there and that is what counts.

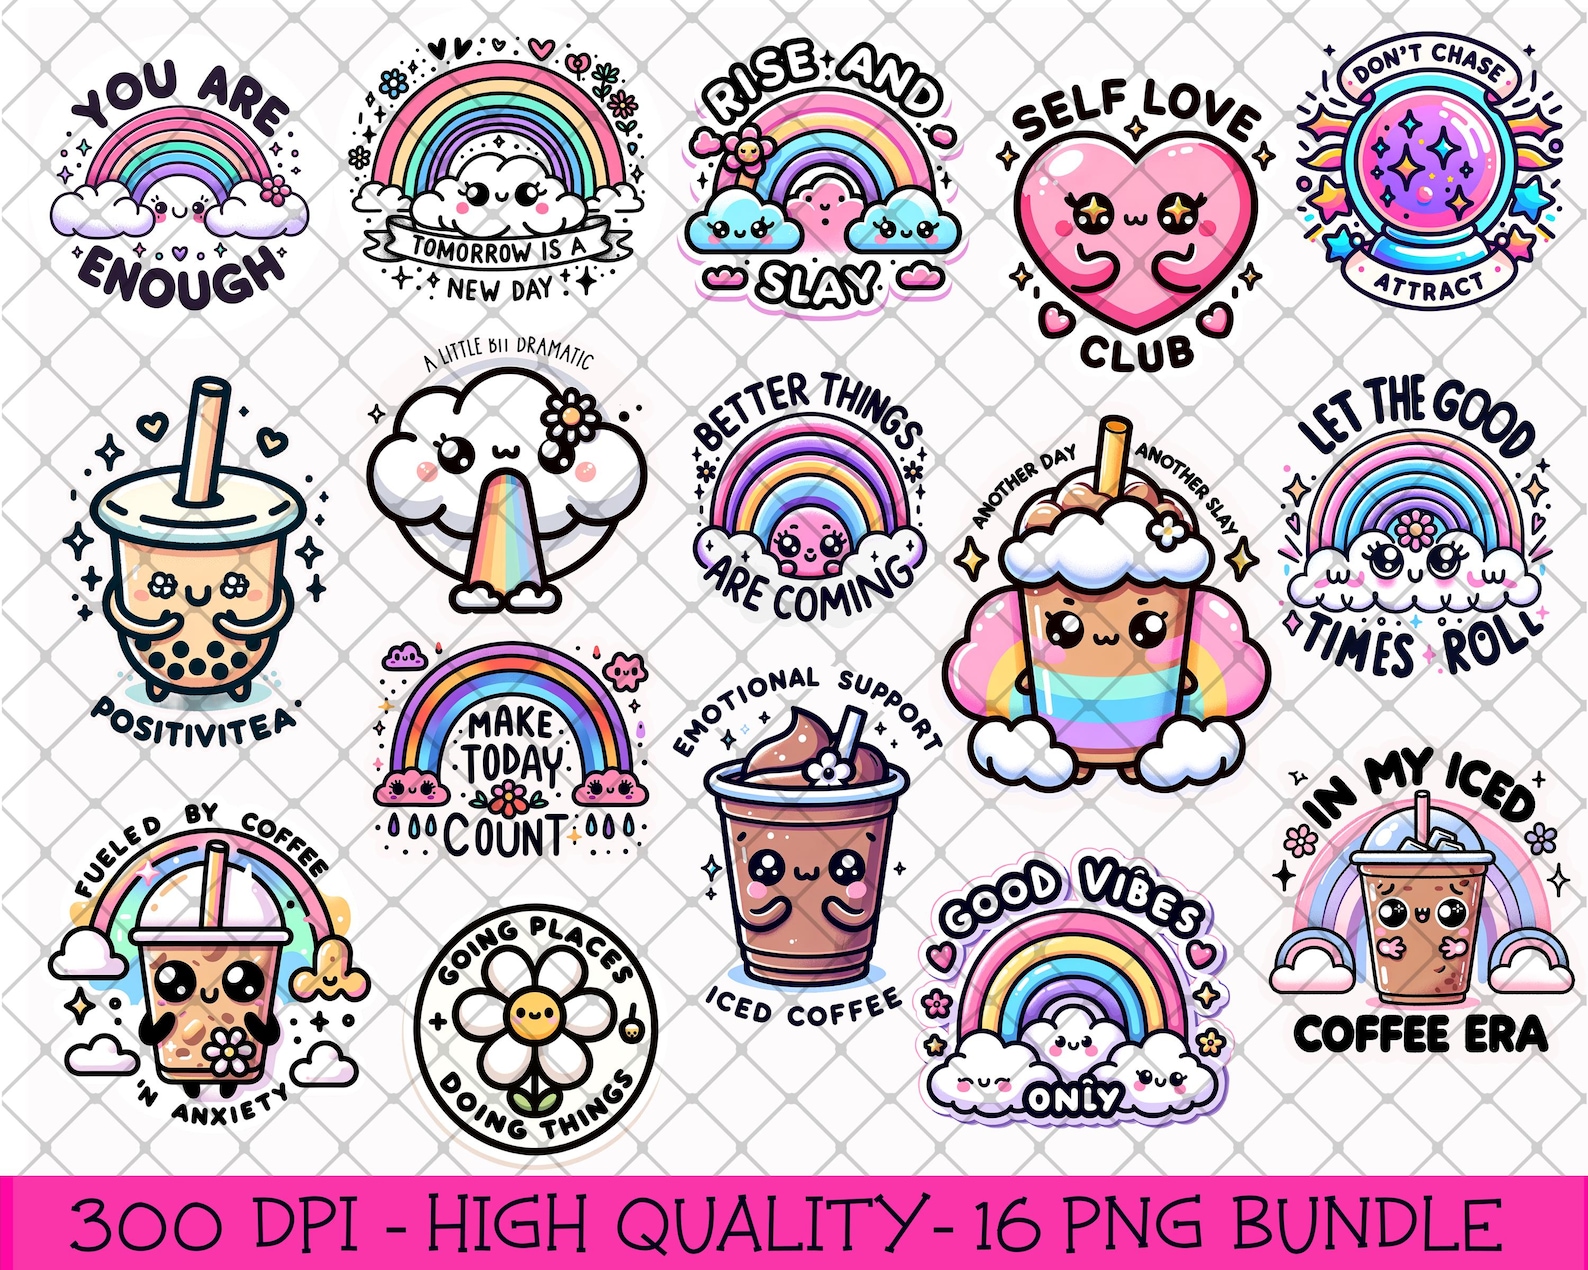
High Vibes Clipart for Magnets
This is the clipart I used below. It's such a cute set for magnets and stickers. You can find it right here.
![]()
If you are making the magnets with Cricut Design Space I added a small white border to each image to allow for an even cut. You will need to create an offset to do this. I found out the hard way that you cannot use the sticker function when making magnets. This is because it will not let you select a proper cutting setting in the materials section.


So after you create a slight offset and attach it to the artwork – you will then be able to choose a material to cut. If I am using this magnet paper with a transparent laminate sheet on top I would select “acetate” with “more” as the setting for the cut. This worked for me but please let me know in the comments if you think a different setting is better for your machine.
Please keep in mind the Cricut Joy Xtra is not as strong as some of the bigger cutting machines so feel free to experiment and see what works best for you.
Thank you for reading this far. I appreciate you!